



A Beginner's Guide to POV-Ray
3D artwork with Paul Webb
Are you an aspiring computer artist who is discouraged by a sneaking suspicion that you don't have much in the way of artistic ability? If your answer to this question is 'yes', then read on! This article will introduce you to POV-Ray - a program which anyone can use to produce stunning images provided that they have a basic knowledge of coordinates and some time to experiment.
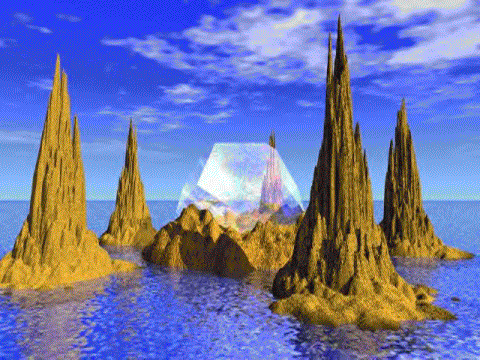
An example of what you can produce on the RISC OS version of POV-Ray
POV-Ray and Ray-tracing
POV-Ray or the Persistence of Vision Ray-Tracer uses special rendering techniques to produce photo-realistic images. Scenes can be created by using POV-Ray's 'scene description language' to produce a text file that describes a scene in terms of objects (both simple and complex), a camera and a light source. POV-Ray can therefore be used to model simple objects like a simple sphere ,or complete scenes like those below. POV-Ray is also very useful if you intend to model natural phenomena as diverse as clouds, rainbows and fog.
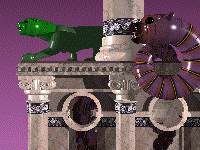
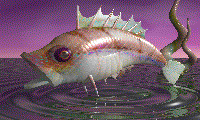
Some complete scenes
Getting Started
So, without further ado, let's get started and render a scene pertinent to RISC World readers. Although POV-Ray is usually employed to create pictures, it can also be used to create 'text objects' by using TrueType fonts. What we are going to do therefore is to create a scene which contains the title of our illustrious magazine floating on a beautiful blue/green sea. Although we could use any TrueType font, we will use one of the bundled fonts which in this case is called 'timrom.ttf'.
But we will first need to specify both a location for our camera and a direction towards which it points as well as using some of the many pre-defined 'include files' which make our task easier to accomplish. So fire up your favourite text editor, create a new file called 'sample' and type in the following code whilst remembering that the POV-Ray language is case-sensitive:
  #include "colors.inc"  //colors.inc refers to a pre-defined include file

  camera {
   location <0, 1, -10>
   look_at 0
   angle 36
  }
We first call one of the many pre-defined include files which in this case is
'colors.inc'.
We then position the camera by using a 'left-handed 3D-coordinate system' which employs a horizontal x axis, a vertical y axis and a z axis where the positive z axis points into your computer screen. <0, 1, -10> therefore places the camera one unit up and 10 units back from <0, 0, 0>. Note also that the camera is 'looking at' the origin.
But we have not as yet created either a light-source or an object to look at! Fortunately, creating a light source can be easily accomplished by adding the following line to your file which places the light source at the position denoted by the vector within angled brackets:
light_source { <500,500,-1000> White }
Great! We are now ready to work on the image itself. The 'blue/green' sea effect can be created by using POV-Ray's 'plane' object:
     plane { <0, 1, 0>, 0
     texture {
     pigment { SeaGreen }
     finish { reflection.35 specular 1 }
     normal { ripples.35 turbulence.5 scale.25 }
     }
     }
We therefore define a plane object where <0, 1, 0>, 0 sets both the 'surface normal' of the plane and the extent of displacement along the normal from the origin as well as defining the surface appearance of our plane by using a 'texture block'. Our texture block consequently describes the pigment, finish and smoothness (normal) of the plane.
We can now place our 'text object' on the plane by inserting the following code. String one is the font that we are using, string two is the word or phrase to be rendered and the floats indicate thickness and kerning distances respectively:
     text { ttf "timrom.ttf" "RISC World" 1, 0
     pigment { BrightGold }
     finish { reflection.15 specular 1 }
     translate -2.5*x
     }
Brilliant, our scene can now be finished off by adding some clouds to the sky from the include file 'skies.inc':
     #include "skies.inc"
     sky_sphere { S_Cloud5 }
Rendering our Masterpiece
But how do we actually produce the image?
In common with many Unix ports, POV-Ray is invoked from the command line by typing 'povray' in combination with a number of options or 'switches' at the Task Window prompt. A generic POV-Ray command may consequently look like the following:
*povray +isample +w200 +h120
The '+i' option instructs POV-Ray to input a particular file for rendering whilst '+w' and '+h' set the width and height of the image in pixels. If all goes well, POV-Ray will beep when it has finished rendering the image which will be in Targa format (filetype &69D) although you can generate PNG images by using the '+FN' switch. Your masterpiece can then be viewed by either using ChangeFSI, Translatr or ShowTga. Figure Five shows the finished result.
Congratulations, you have written and rendered your first POV-Ray scene. But perhaps the best way to learn how to use POV-Ray is to tinker with pre-existing scripts in order to see what happens. So why not change the thickness and offset values in our sample file? You'll be amazed at some of the effects that you can create.
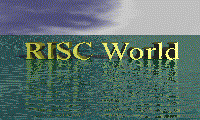
The sample POV-Ray image we have created
Welcome to the world of ray-tracing!
Obtaining POV-Ray
POV-Ray is available to download from Jerome Mathevet's POV-Ray page which also contains an impressive gallery and links to RISC OS-relevant POV-Ray utilities. If you don't have internet access, then check out APDL discs B096 and B096-A.
(Or you could just check out this issues DiscWorld for a copy - ED)
Resources
The POV-Ray distribution also comes with an excellent User Guide which includes both an introductory tutorial and a more detailed reference section. The official POV-Ray web site similarly contains many useful links to resources and to the stunning work of other users which should encourage you to redouble your efforts!
Paul Webb