


Holding a Candle to ArtWorks...
Richard Ashbery demonstrates some impressive ArtWorks techniques.
Introduction
I have just held my ArtWorks exhibition in Mansfield and received some very encouraging comments. This of course has held me back from producing further tutorials. However the exhibition is now over I can concentrate on producing further articles.
Up to now I've covered tutorials on kaleidoscope creation (both Photodesk and ArtWorks), A Planetary image and Tessellation. This time I thought I'd look at how ArtWorks can be used to create some of the tutorials published for the Xara* vector suite. Although we don't have all the specialised tools many of the drawings can be done in ArtWorks. The following article contains detailed instructions for creating the candle.
Making a Start
- Switch on the grid and grid lock (CTRL-F10). Set subdivisions to 4.
- Use the rectangle tool and drag out a rectangle.
- Convert to shapes by pressing CTRL-N.
- Select the top-left-hand control point and drag it slightly to the right. Do the same for the top-right-hand control point but dragging it left. This gives a tapered effect.
- Colour it (see Note About Colours at the end of the article). Change it's line width to 2 point (this is temporary outline used to illustrate what happens when joining 2 shapes) using CTRL-F4.
- Using the ellipse tool drag out an ellipse as shown for the base (Figure 1).
- Drag the ellipse to position shown.
- The two shapes now need to be joined.
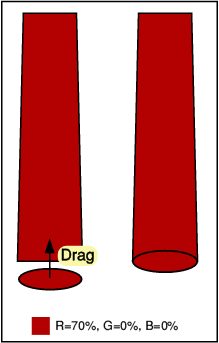
Figure 1
A Return to the Intersect Tool
There is no easy way of joining the rectangle and the ellipse apart from using this powerful tool. Follow the procedure exactly (figure 2).
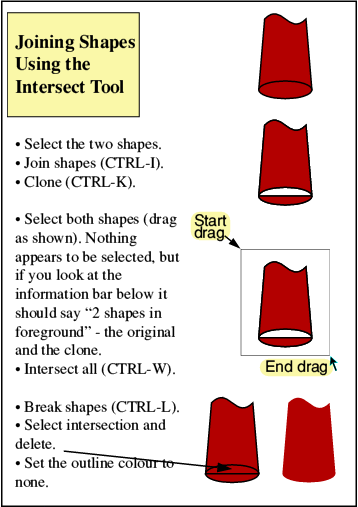
Figure 2
The Top of the Candle
Imagine how the top of the candle might appear as it burns down. The shapes I came up with are shown in figure 3. To keep things as simple as possible this tutorial uses the 'S' shape. Adding an extra shape behind the 'S' improves the realism. Figure 4 shows how this is achieved. Finish the candle by applying the graduated fills illustrated in figure 5.
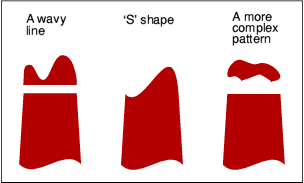
Fig 3
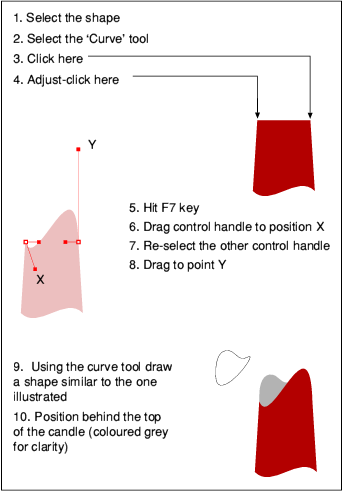
Fig 4
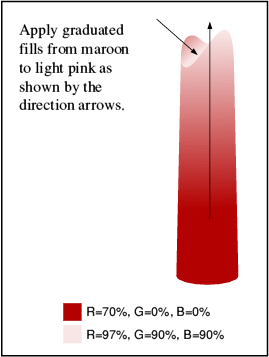
Fig 5
Now the Hot Part
Create the flame by following procedure in figure 6.
Xara has a unique elliptical fill facility. The flame can be rendered very accurately since the fill follows the contours of the ellipse rather than a circle. It is also unusual in that it allows the user to set an extra fill colour. In Xara the flame is rendered with a white centre going through to cream and finally orange and follows the ellipse contour. The ArtWorks translation is still very capable.
Draw the wick, apply a graduated fill and position all elements as shown in figure 7. Using CTRL-Shift-B ensure the wick goes behind the front of the candle.
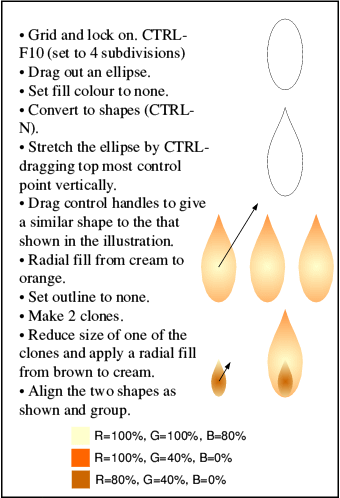
Fig 6
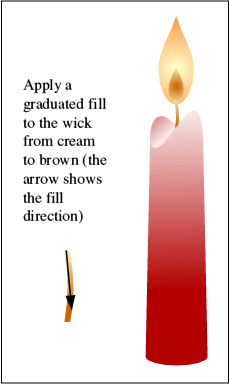
Fig 7
Adding a Background and Enhancements
The picture can be enhanced by applying blends to create a warm glow around the flame and a floor reflection but first the candle must be set against a suitable background. I have chosen black (figure 8).
All the blends and their parameters are shown in figure 9. I'll describe only one of these - the floor reflection. All the others are done in a similar way.

Fig 8 Not bad but something's missing
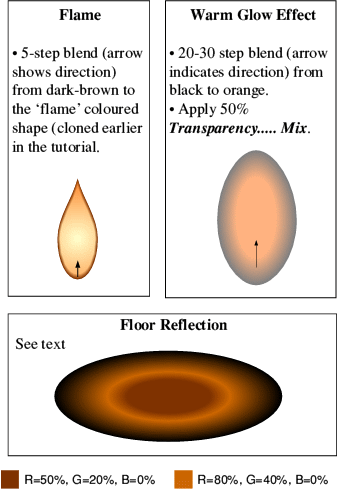
Fig 9
The Floor Reflection
Refer to figure 10.
- Drag out an ellipse and colour it brown.
- It is essential to ensure the outline colour is 'none' - "Adjust-click" on the 'none' icon on the colour bar.
- Clone the ellipse and move it away from the original. This clone will be used for the larger blend.
- Clone the ellipse again and colour it dark brown.
- Use the Scale tool to reduce the clone to approximately the width of the base of the candle.
- Apply a blend of 20-30 steps as shown by the arrow.
- Working with the duplicate ellipse clone again and colour it black.
- Double the size of the clone using the Scale tool.
- Move this newly cloned black coloured ellipse behind the brown one by pressing CTRL-Shift-B.
- Apply a blend of 20-30 steps as shown by the arrow.
- Click on Blend 1 and hit CTRL-F to ensure that it is at the top of the stack.
- Adjust-click on Blend 2. Both must be selected for alignment to work.
- Display the alignment tool by hitting CTRL-F9.
- Select On/Off buttons for Top to bottom and Left to right. Click both Centre radio buttons. Click on OK.
- Group both blends. The bottom illustration in Figure 10 shows the final result.
- Use CTRL-Shift-B to position behind the candle base.
Create the remaining blends in figure 9.
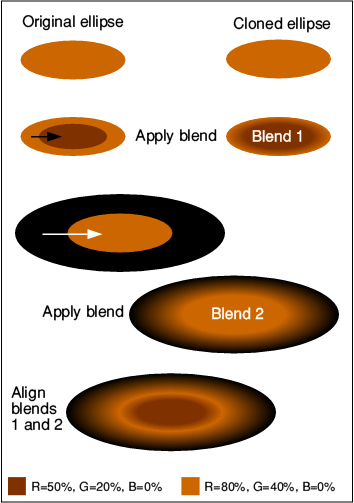
Fig 10
Combining Shapes/Blends
Combine all the shapes created so far - your drawing should be similar to figure 11.
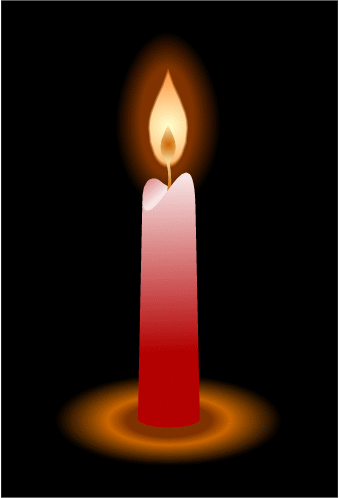
Fig 11
Further Enhancement
Wax dripping down the side of the candle puts the finishing touches to the drawing. The process is shown in figure 12.
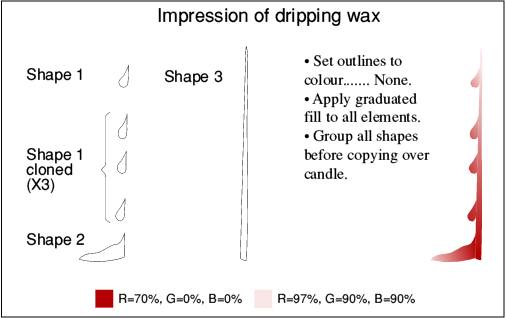
Fig 12 Add dripping wax
ArtWorks versus Xara
In my opinion when it comes to drawing a subject like this there is little to choose between them. Some of the ArtWorks tools may not as sophisticated as those employed in Xara but with a little effort it is surprising what can be achieved. Xara makes use of fills but these don't seem to translate accurately in ArtWorks. There is usually an alternative way of tackling the problem in this case by using blends. Figure 13 shows the comparison.
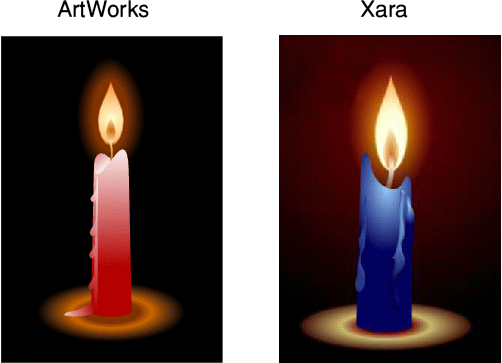
Fig 13
The Final Picture Animated
The static picture seems to render nicely in ArtWorks but animation really brings it alive. ArtWorks with its ability to generate multi-page documents makes the job of creating a simple animation fairly easy. Exporting a sequence in Sprite format and placing through InterGIF will give the result in figure 14.
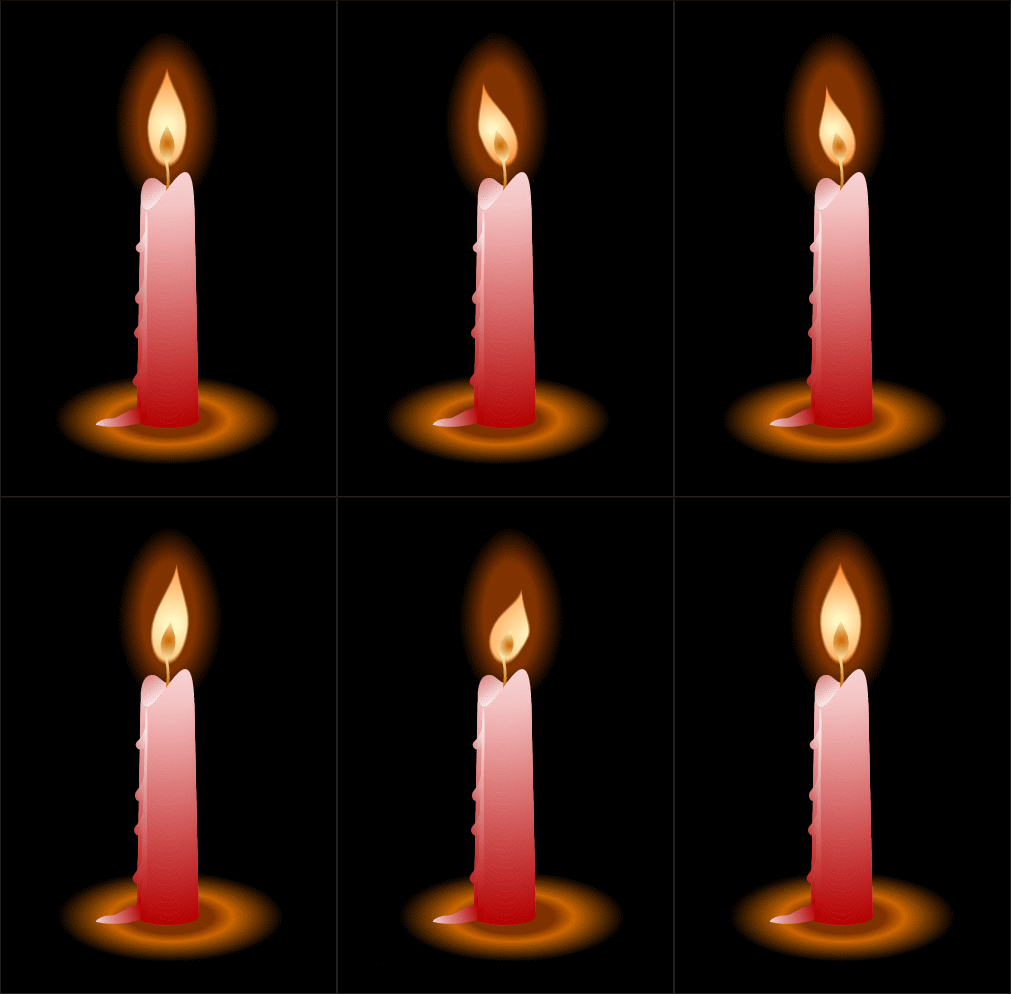
Fig 14
Finally
In my next contribution I hope to make further comparisons between these two excellent packages. If readers find my tutorials useful a few comments under the "Letters Page" would be very welcome.
Note About Colours
Object colours in the Xara tutorials are shown in RGB with a numeric value alongside each illustration. I will adopt the same clear representation in my tutorials. A rapid way of getting the colours into ArtWorks is to click the menu button over the blank area to the right of the default colours and select the sample icon in the New colour window. Move the sample icon over any colours in this tutorial, rename and click OK. The new colour will be assigned to the AW colour bar.
* Xara Group Ltd (formerly Computer Concepts)
Richard Ashbery